
The current immersion chiller we’ve been using is a 14m 1/2″ copper one that we purchased at the same time as the Braumeister. It works ok, however when chilling 55L of wort, it has taken us up to an hour of chilling to get the wort down to pitching temps (<= 20C). The other problem we’ve got with the chiller is that it won’t fit around the hop spider basket we’ve got for the Braumeister, which means that you a) either remove the hop spider before chilling, or; b) don’t use the hop spider. I think there is benefit in using the hop spider to contain a lot of the hop matter, particularly for hoppier beers, so I started searching for an IC that might fit the bill.
My search led me to JaDeD brewing’s Hydra IC. Reviews of the Hydra all talk about it’s amazing cooling performance, and the base design also has a wider coil diameter, which looked like it would fit around the spider. JaDeD are unfortunately US based and whilst they ship internationally, the cost to send a huge amount of copper, is obviously, well, huge. So i started thinking about how I could get one built locally.
My original plan was to draw up a design and then approach a plumbing place to see if they could assemble it… As the plans went on and I read more, that plan changed to me constructing it – After all – how difficult can a little copper soldering be?
Design
The design of the IC was the following. 1/2″ incoming/outgoing lines, split into 3 parallel 3/8″x18m runs. The 3x 3/8″ tubes would be coiled like a double helix, but with three lines (thus triple helix). This was done with the aim to maximise the surface area contact with the base water temperature. The diameter of the coils was ~350mm so that it could sit on the bottom of the Braumeister without sitting on the electric elements and still allow the use of the central hop-spider whilst chilling.
Materials
| Item | Qty | Price | Supplier |
| 18m coil of 3/8″ Copper Tubing | 3 @ $65.80 | $ 197.40 | eBay – haitonparts |
| 1.5M of 3/4″ Copper Tube | 1 | $18.79 | Bunnings |
| 1 1/8″ Copper End Caps | 2 @ 5.50 | $11.00 | Actrol |
| 1 1/8″ OD to 3/4″ ID Reducer | 2 @ 7.50 | $15.00 | Actrol |
| 20C x 20Ml Brass Compression fitting | 2 @ $7.90 | $15.80 | Bunnings |
| 12mm x 20/25mm BSP Brass Tap Adaptor | 2 @ $9.65 | $19.30 | Bunnings |
| Copper Wire (9M) – 1.62mm/14G | 1 | $16.00 | eBay |
| Tradeflame Solder and Flux Kit (Plumbers) | 1 | $30.26 | Bunnings |
| Cable Ties | 50 (ish) | $0 (already had) | Bunnings |
| Stainless Pipe Clamp 46-70mm | 2 @ $6.16 | $12.32 | Bunnings |
| TOTAL | $335.87 |
Tools required
- Spring Tube Bender – 3/8″
- Lever Tube Bender (optional)
- Tube Cutter
- Drill
- Drill Bit – 3/8″
Process (Recommended)
The following process is what I ended up doing after a few false starts… You can read more about those below.
To Prepare, I put paper around the Braumeister malt pipe to reduce risk of scratching.
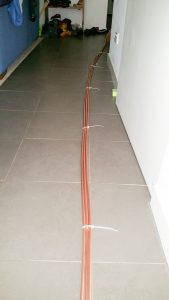
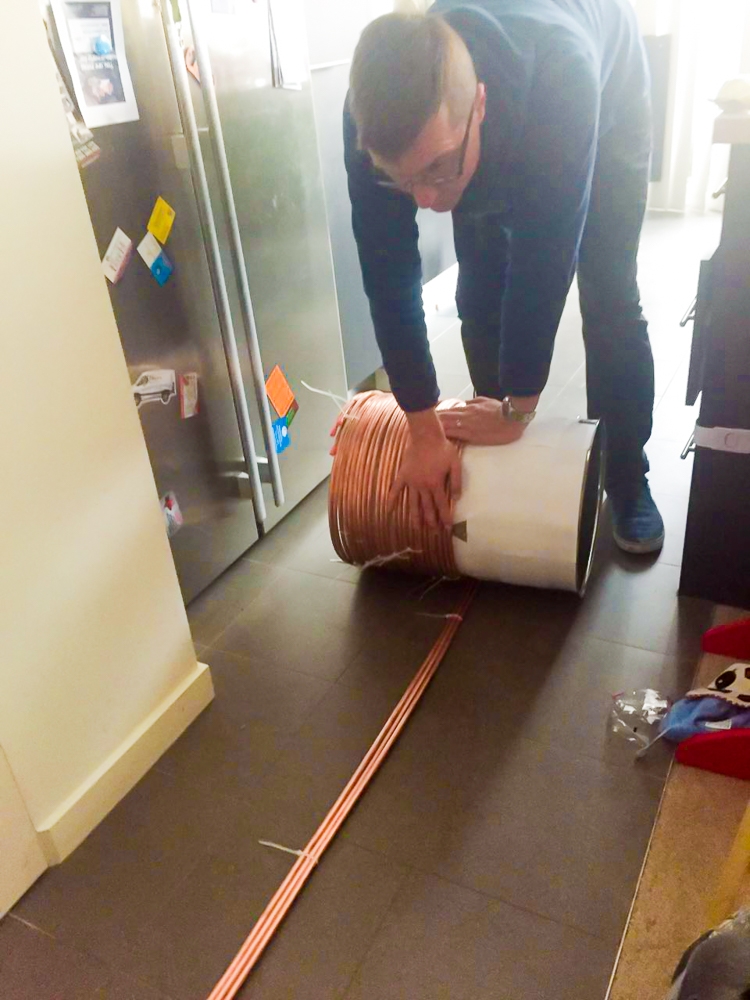
- Extend the three copper tubes out on the floor as long as you can do a straight run. I used the hallway between our kitchen and livingroom and got a run of about 6m.
- Use the cable ties to tie the three tubes together every 50cm or so.
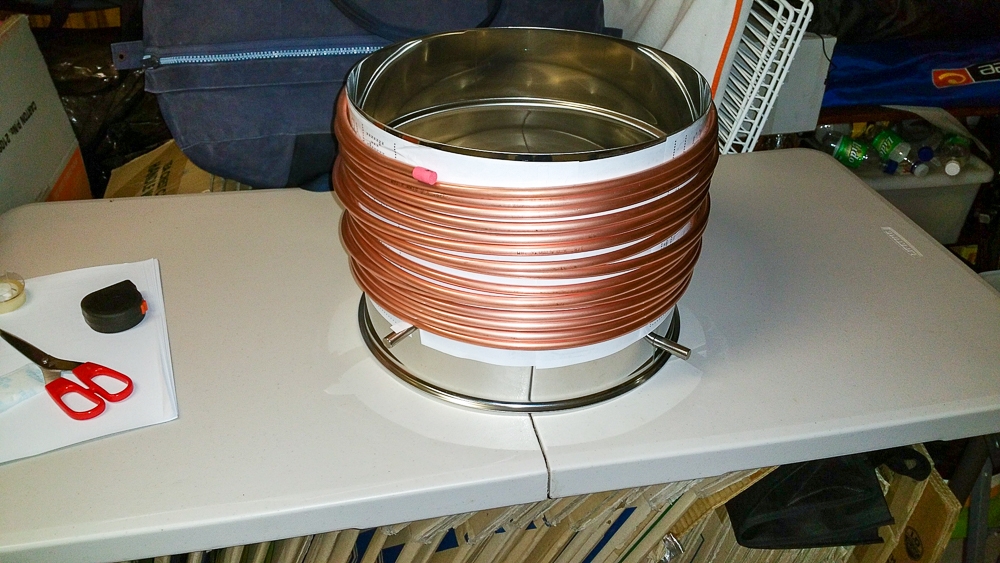
Extended and cable tied tubing - Take your malt pipe and use it to roll the copper into the tightest coil you can manage. Keeping the start end at the bottom of the pipe.
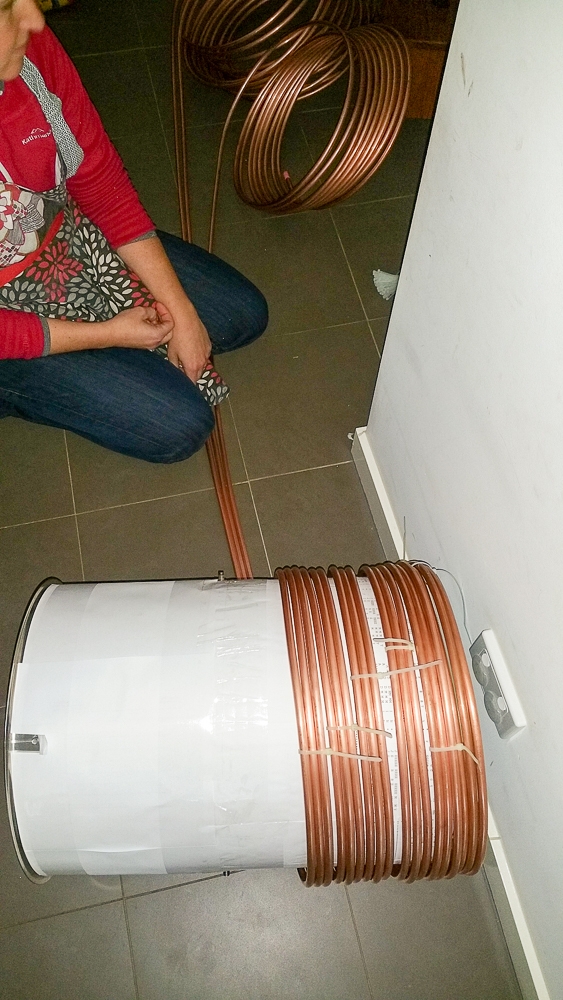
Winding coils onto Braumeister malt pipe - As the malt pipe fills up with coil, slide it off the pipe and use some cable ties to tie the coils together (to keep them in shape).
Cable tying formed coils to keep shape - Keep rolling until you’ve done the whole lot. If your hallway isn’t 18m long (as mine isn’t), then when you reach the end of your rolled out piece, you will need to take the coiled part back to the start and roll more out.
Ran out of room - Repeat 3-5 until all the copper is coiled.

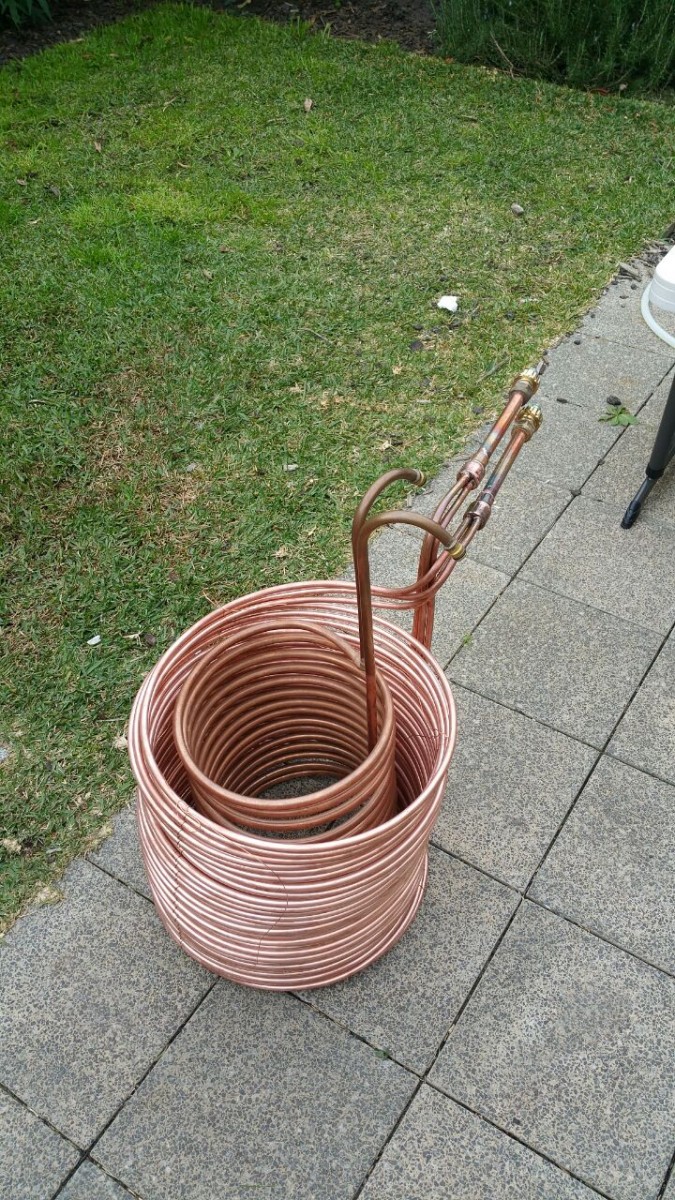
Completed coil - Take the last 1 M from the bottom and using your spring tube bender bend it up the middle. Use the tube bender to straighten these into a vertical rise. (I did mine on the outside, but wish I had done mine in the middle)
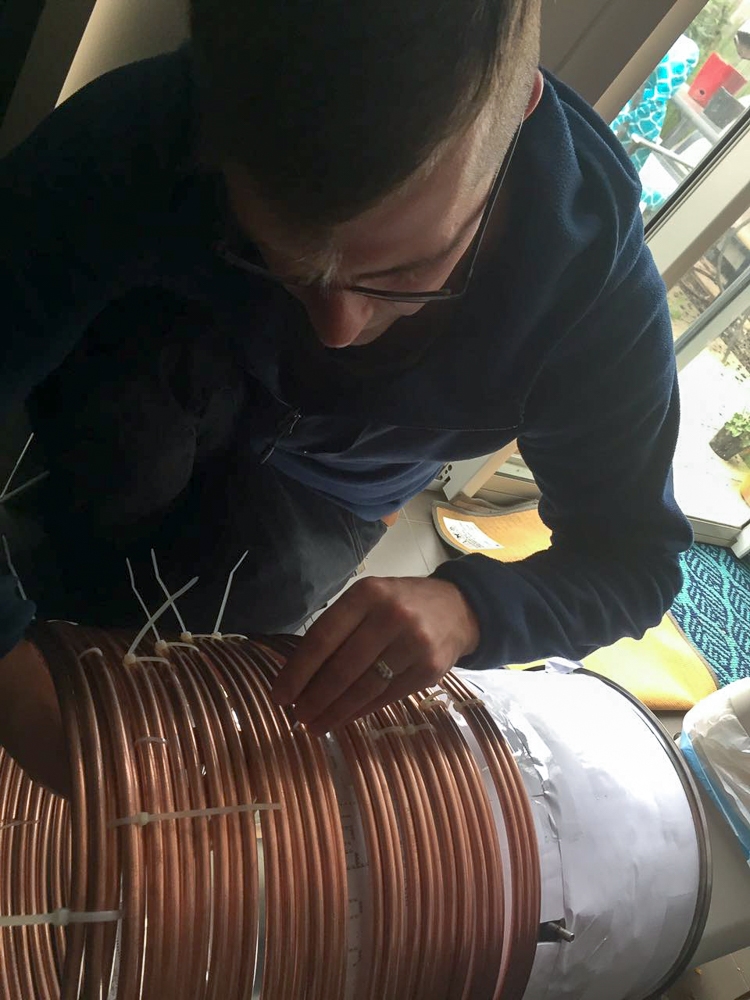
- Take the wire and cut off 3x lengths of about 5x the height of the coils (i.e. 3x 2.5M lengths).
- Twist the wire around the tubes in 3 even locations around the coil. TIP: When threading the copper in between the pipes, don’t lead with the end of the wire (i.e. the pointy bit), as you’ll end up with twists and kinks. I found it easier to lead with a loop of wire closest to the tubing and then pull it through.
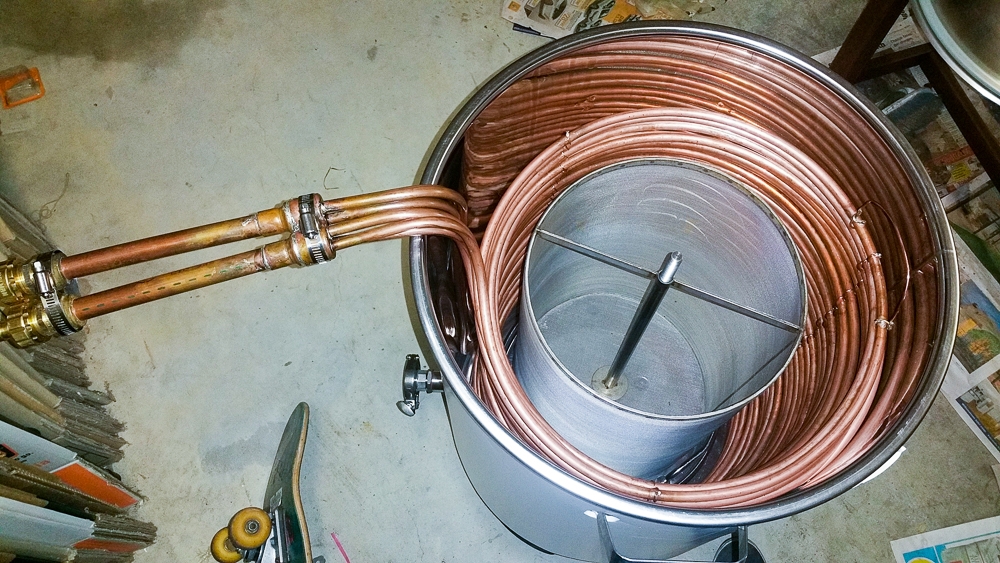
- Once the loops have been secured with wire, put the unit into the Braumeister to measure the height. Use a pipe bender to bend the upright tubes towards the outside of the unit.
- Cut off and even up the ends of the 3/8″ copper tube so that they are all aligned
- Drill 3x 3/8″ holes in the 2x 1 1/8″ end caps and de-burr. Use a piece of cut-off 3/8 copper to push through and loosen up the holes. NOTE: You don’t need/want too much room to fit the ends of the 3/8″ copper tubing through. Too much space will make soldering difficult.
- Clean the ends of the copper tube and inside the end caps with steel wool.
- Push the caps onto the ends of the copper tube make sure they’re even with about 5mm of copper tube pushed through the cap
- Paint the inside of the cap and all around the ends of the tubes (you might need to push the cap further down the tubes to get in between the tubes. It’s important that the flux is on all surfaces to be joined.
- Align the chiller so that the caps are upright like a cup/glass. Heat the caps and the tubes with a blow-torch and then add the solder. Fill up with solder so that the tubes and cap are well coated.
- Clean and flux the 1 1/8″ to 3/4″ reducer. Clean the inside of the end cap again with steel wool and flux.
- Solder the reducer onto the 1 1/8″ end cap.
- Cut-off some 3/4″ copper pipe.
- Clean, flux and solder the 3/4″ pipe into the reducer.
- Attach the Brass compression fittings to the ends of the 3/4″ pipes. Ensure tight
- Attach the tap adapters to the end of the compression fittings. Ensure tight
- Attach to water and check for leaks. Clean, flux and re-solder where you find leaks (hopefully you won’t find any).
- Remove the tap adapters.
- Add the 2x pipe clamps over the ends of the 3/8″ tubing. Tighten one where the end caps/copper reducers are. Leave the other loose.
- Re-attach the tap adapters to the end of the compression fittings. Ensure tight
- Move the loose pipe clamp over the compression fittings and tighten.
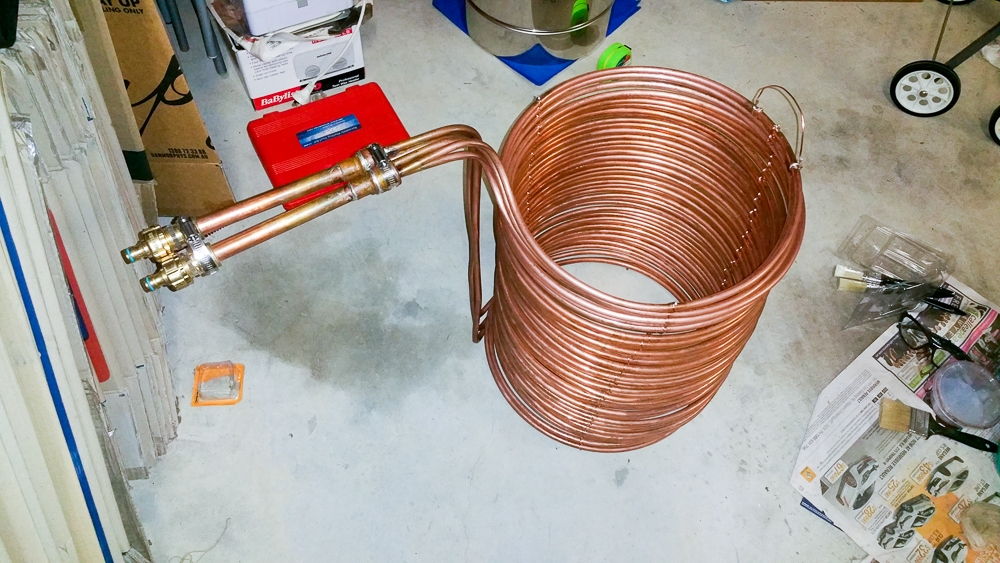
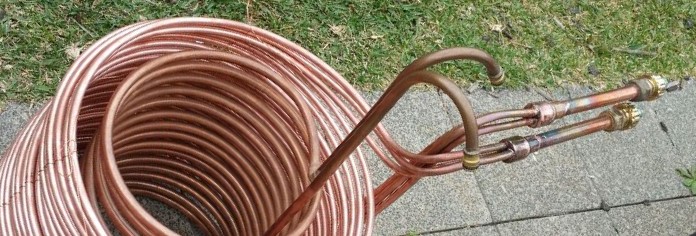
Finished chiller with pipe clamps

Process (Not recommended)
- Make 3x separate coils by winding each 18m lot of 3/8″ copper tubing around the Braumeister malt pipe.
Making separate coils - Join the 3x coils by interwinding them together.
- This proved impossible, as they were slightly different diameters due to inconsistencies in pressure when forming the initial coils in step #1.
- They were also slightly too flexible to be able to handle effectively.
What worked well
- Cable ties to hold the three lines together
- The 1 1/8″ end cap gave enough room to drill the three holes. I attempted previously on a 20mm (3/4″) end cap and it was much too small/tight.
- I used the spring tube bender much more than I expected to. It was easy and pretty cheap to buy. These are awesome!
- Ensure you’ve got a good blow-torch, flux and plumbers solder. I also had a combined solder+flux type solder (plumbers) which was useful for fixing some of the leaks as you could directly solder with that.
What I’d do differently next time
- Double check the prices for JaDed IC’s shipped to AUS. This project took a lot longer than anticipated and, whilst I’m happy with the results, the JaDeD ICs are works of art with proven performance.
- I drilled out the 3/8″ holes end caps a little much to make sure that pushing onto the tube would be easier. This made soldering more difficult as it would drip out of the larger holes.
- I’d do the Recommended process outlined above straight away. I did the Not Recommended process followed by the Recommended process, which meant that my tubes were slightly more work hardened and therefore weren’t as tight as I would’ve liked them to be. This resulted in the unit not sitting neatly on the bottom of the Braumeister as desired.
Results
I ran a test of the coil by boiling 55L of water in the Braumeister and then using the coil to chill it down. Without moving the coil, but using the Braumeister pump, I got the following results.
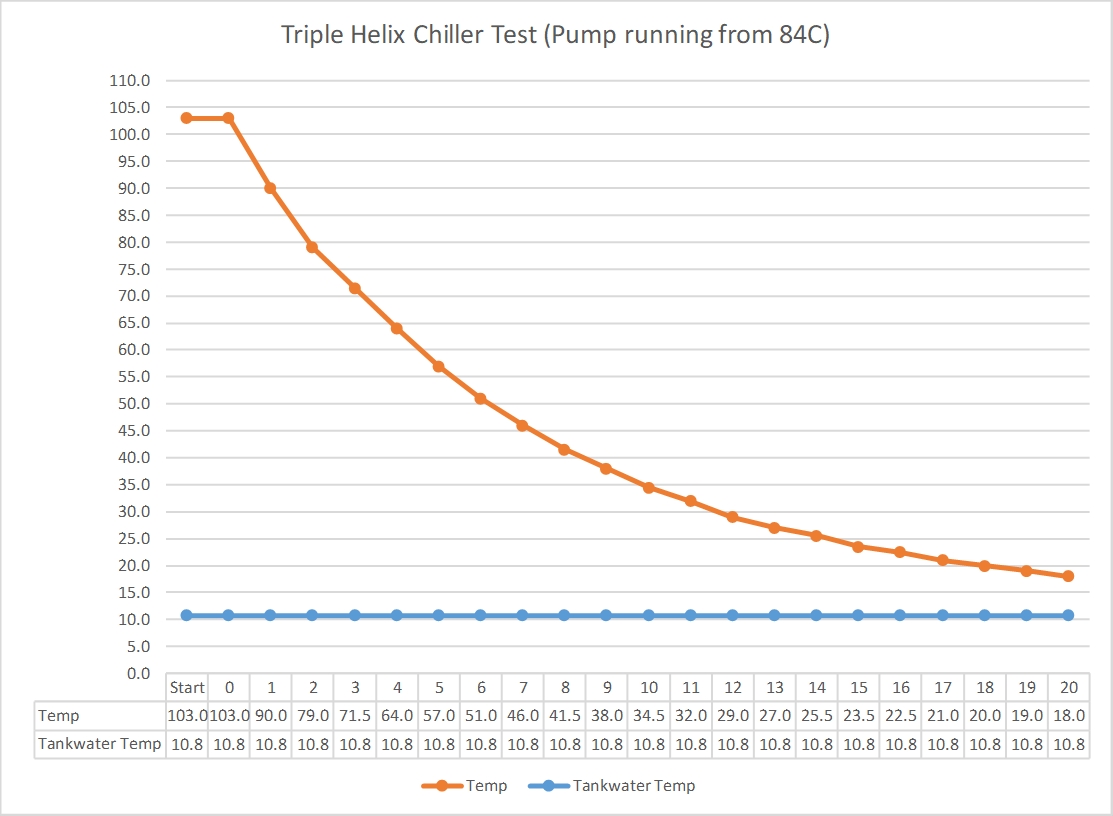
I believe that if I move the coil up/down (or continuously stir the wort), that I should be able to improve the cooling time even further (in line with the JaDeD) coolers